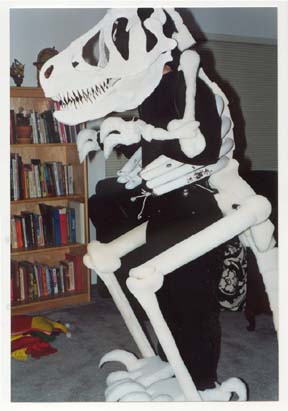
May as well start out with the best. This is my favorite costume and the one that has won the most awards. Imagine seeing a six foot Tyrantosaurus Rex Skeleton disco dancing! Well that is what this fellow does.
He has won three Halloween contests, so far:
I have always loved Dinosaurs,
and this costume is proof; it took about three months of evenings to complete.
It is a combination of many materials and a few insights of my own about building
costumes. I probably learnt the most from building this one.
And coincidentally, the key to the costume's mask/skull and body were to start by
building an inner skeleton.
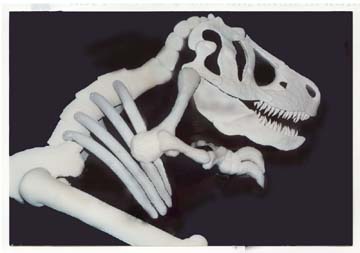
This costume and in particular, the skull started out as an art project with sheet
aluminum. I was drawing a half scale T-Rex the summer Jurassic Park came out, and
one night I was trying to make light shades by cutting sheet aluminum and rounding them into a cone. Well I did not have the tools to make the shades; so I tried cutting out the bones of the T-Rex Skull from the aluminum. Then I used double-back tape to join the bones. I discovered that due to the tape's thick spongy nature, it worked well for connecting the irregular surfaces of the curving bones. By the end of the evening, I had a bright shiny aluminum T-Rex Skull and thought about making it into a lamp shade...
 Fortunately, I forgot about the lamp shade idea, and realized I could turn the aluminum frame
into a realistic bone T-Rex skull by adding Crayola's (yep, the crayon people) Model Magic Modeling Compound, which is a foamy air dry clay that is very light when hardened.
Using this Compound is like trying to sculpt with marshmallows; it is very sticky and soft, but once it hardens it is like a piece of styrofoam with much more bend and give to it.
Since I only had to cover the frame with the Compound, it was fairly doable, but still a little tricky.
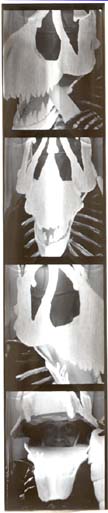
To make sure that the Compound stuck to the aluminum, I pierced the metal with an awl about every two inches, then pushed some Compound threw the holes, and flattened the protruding Compound to secure it on the frame.
This worked quite well.
The surface the clay formed had the look of bone and was easily painted with white spray paint for uniformity.
Fortunately, I forgot about the lamp shade idea, and realized I could turn the aluminum frame
into a realistic bone T-Rex skull by adding Crayola's (yep, the crayon people) Model Magic Modeling Compound, which is a foamy air dry clay that is very light when hardened.
Using this Compound is like trying to sculpt with marshmallows; it is very sticky and soft, but once it hardens it is like a piece of styrofoam with much more bend and give to it.
Since I only had to cover the frame with the Compound, it was fairly doable, but still a little tricky.
To make sure that the Compound stuck to the aluminum, I pierced the metal with an awl about every two inches, then pushed some Compound threw the holes, and flattened the protruding Compound to secure it on the frame.
This worked quite well.
The surface the clay formed had the look of bone and was easily painted with white spray paint for uniformity.
Because the Magic Modeling Compound is so light, the lower jaw ended up weighing less than two pounds, making it possible to simply strap it to my jaw and head with a one inch strip of elastic. This allows the jaw to open and close as I open and close my mouth. The results were amazing. To hold the the skull on my head, I used a plastic construction helmet with a good inner frame that held my head firmly. I painted the helmet flat black and used pop-rivets to attach it to the aluminum frame. I had to cut away some of the aluminum for the helmet to fit, but I was fortunate that it fit right in place. To finish the skull off, I painted any of the metal that was not covered in the Compound either flat black or white, to either make it disappear or resemble bone.
The final touch was adding the fifty-some teeth. This took a couple nights worth of sculpting varying sizes of teeth over a core of cut sheet aluminum with a ninety degree fold at the bottom, to form each tooth's base. The bottom metal tabs were then double-back taped in position in the jaw and skull. The sheer number of teeth made this a laborious process, but the ferocity that it creates in the mask made the work well worth it. I dare you to stick your head in this creatures open mouth.
More about the Costume later...
by Earl B.